

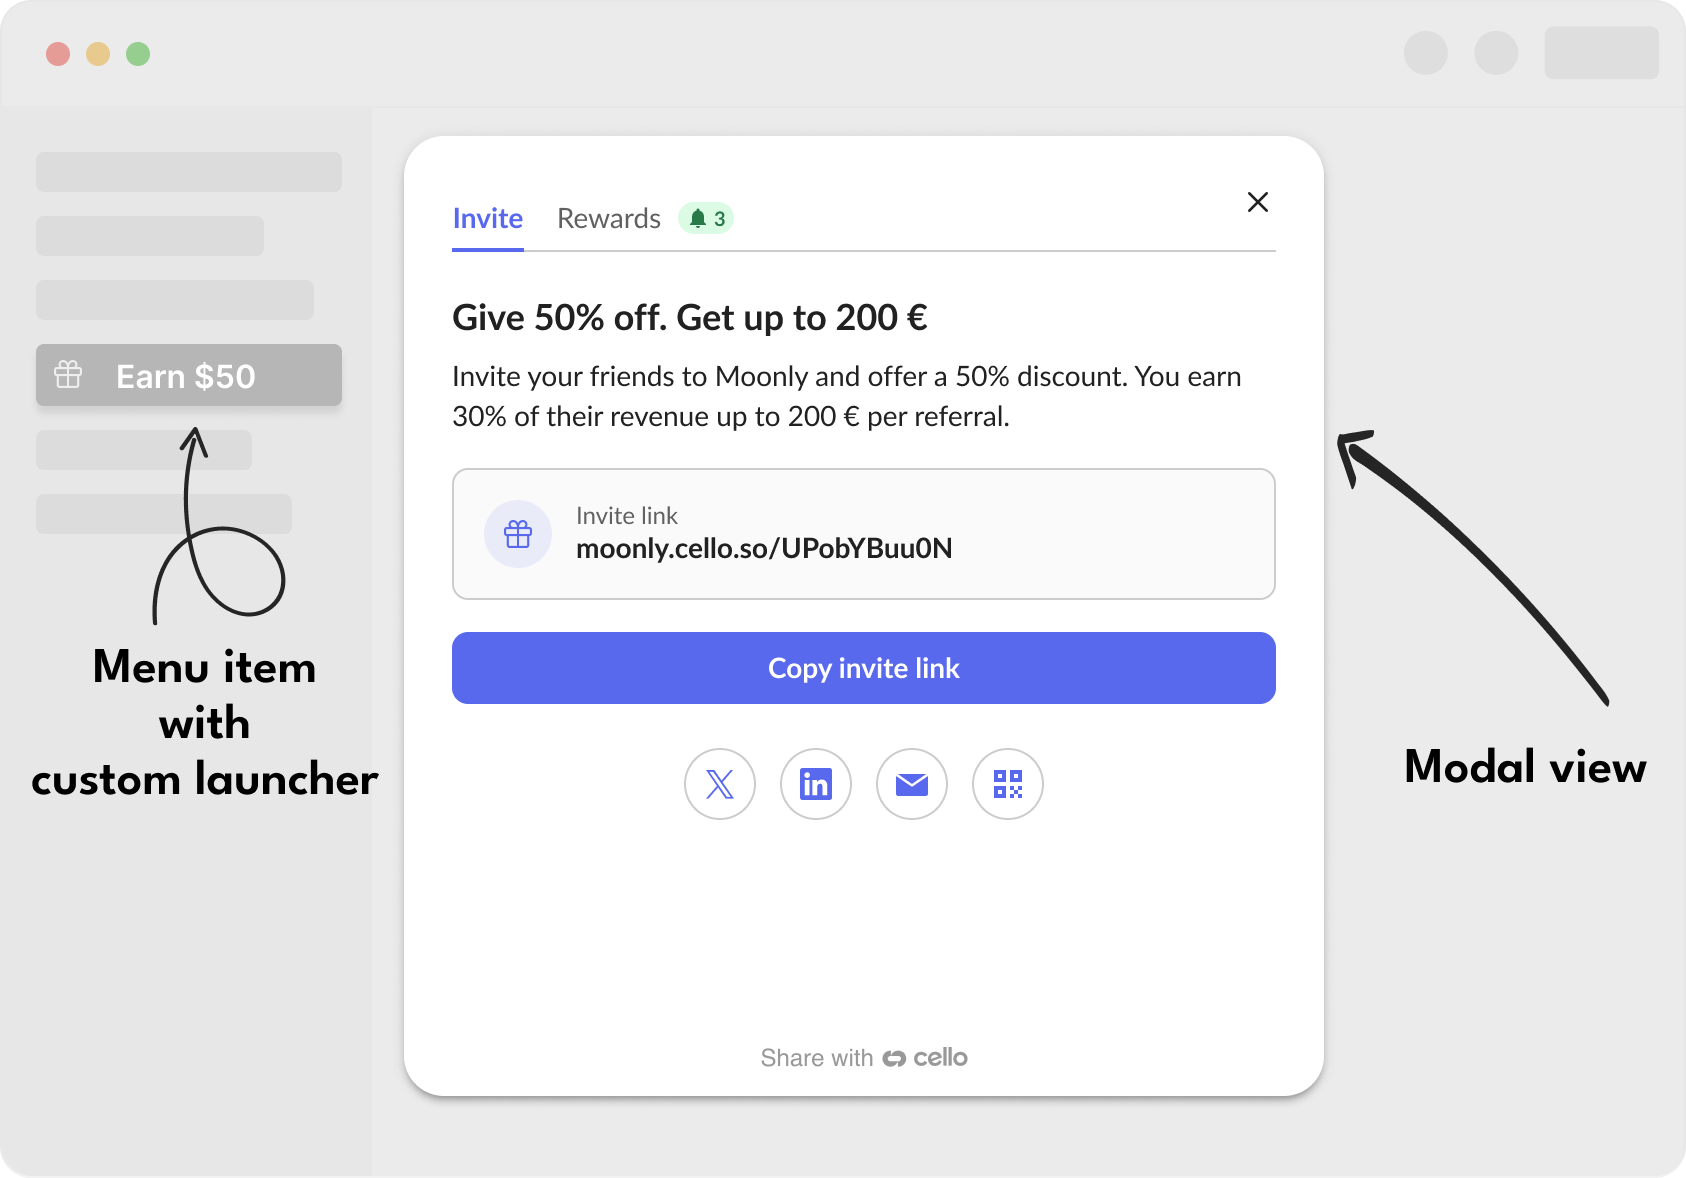
Implementation Guide
Step 1: Create your launcher element
Create an HTML element that will trigger the Referral Component. The element must:- Exist in the DOM before
cello.boot()is called - Have
position: relativeCSS styling - Use a unique identifier (ID, class, or attribute)
- React
- HTML
- Vue
- Angular
Step 2: Configure Cello Portal
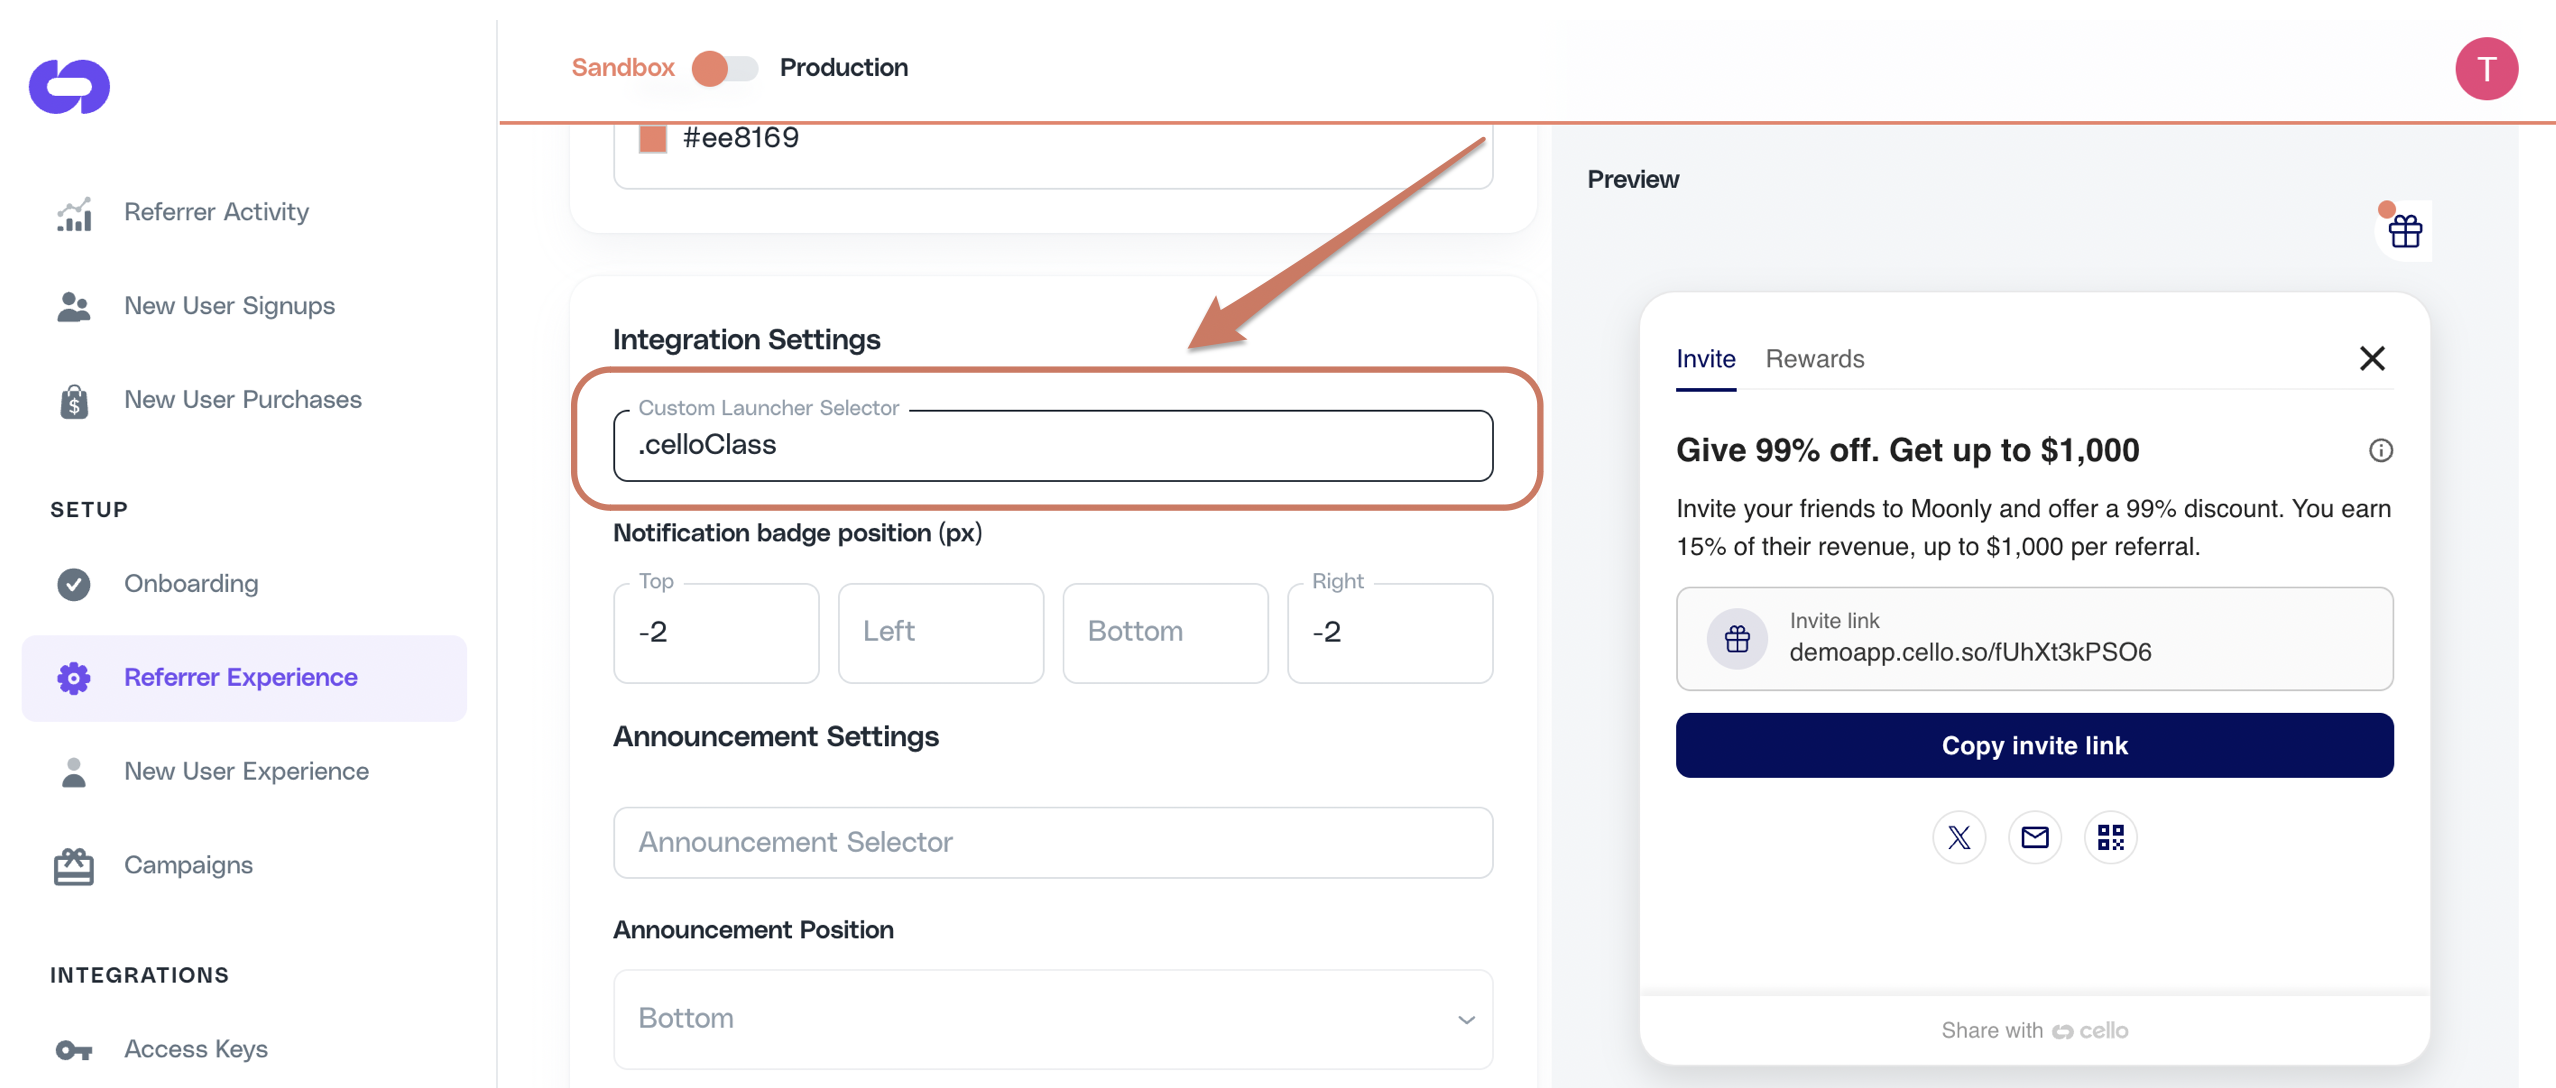
- Navigate to User experience → Widget in Cello Portal
- Set the Custom Launcher Selector to match your element:
- For ID:
#cello-launcher - For class:
.cello-launcher - For attribute:
[cello-launcher]
- For ID:
Step 3: Initialize Cello
After the custom launcher element exists in the DOM, initialize Cello:Common Issues and Solutions
Custom launcher not working
Element doesn't exist when Cello initializes
Element doesn't exist when Cello initializes
Problem: The custom launcher element is created after Cello has already initialized.Solution: Ensure the element exists in the DOM before calling
cello.boot(). In React/Vue, render the element with display: none initially, then show it after initialization.Alternative: Open the Referral Component from your own click handler, so the element doesn’t need to exist when Cello initializes. See Open the Referral Component from your own launcher.Missing position: relative
Missing position: relative
Problem: The element doesn’t have
position: relative styling.Solution: Add style="position: relative" to your launcher element. This is required for Cello to properly attach event handlers.Selector mismatch or selector matches multiple elements
Selector mismatch or selector matches multiple elements
Problem: The selector in Cello Portal doesn’t match your element, or matches several elements where only one is visible.Solution: Verify the exact selector format:
- ID selectors need
#prefix:#my-launcher - Class selectors need
.prefix:.my-launcher - Attribute selectors need brackets:
[my-attribute]
document.querySelector and picks the first match in DOM order. Run document.querySelectorAll("<your selector>") in the browser console: it should return exactly one visible element with a non-zero bounding box. If multiple elements match (for example, a wrapper <li> and an inner <span> share the same class), Cello will use the first one, which may be invisible. Either narrow the selector with a parent prefix or use an id. See Troubleshooting: announcement not showing for the same diagnostic flow applied to announcements.Dynamic elements in SPAs
Dynamic elements in SPAs
Problem: In single-page applications, elements are dynamically added/removed.Solution: Keep the launcher element persistent in the DOM, use CSS to control visibility instead of conditional rendering.Alternative: Open the Referral Component from your own click handler, so the element can mount and unmount freely. See Open the Referral Component from your own launcher.
Add reward in launcher
1.5x activation rate 3.5x sharing rate Increase the sharing activity of your users by highlighting the reward directly in the referral launcher inside your menu item.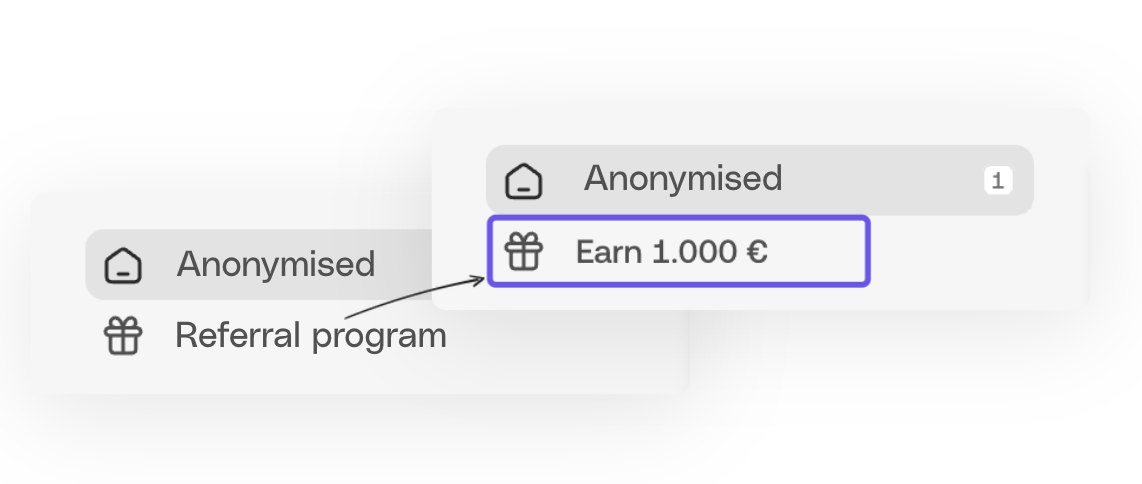
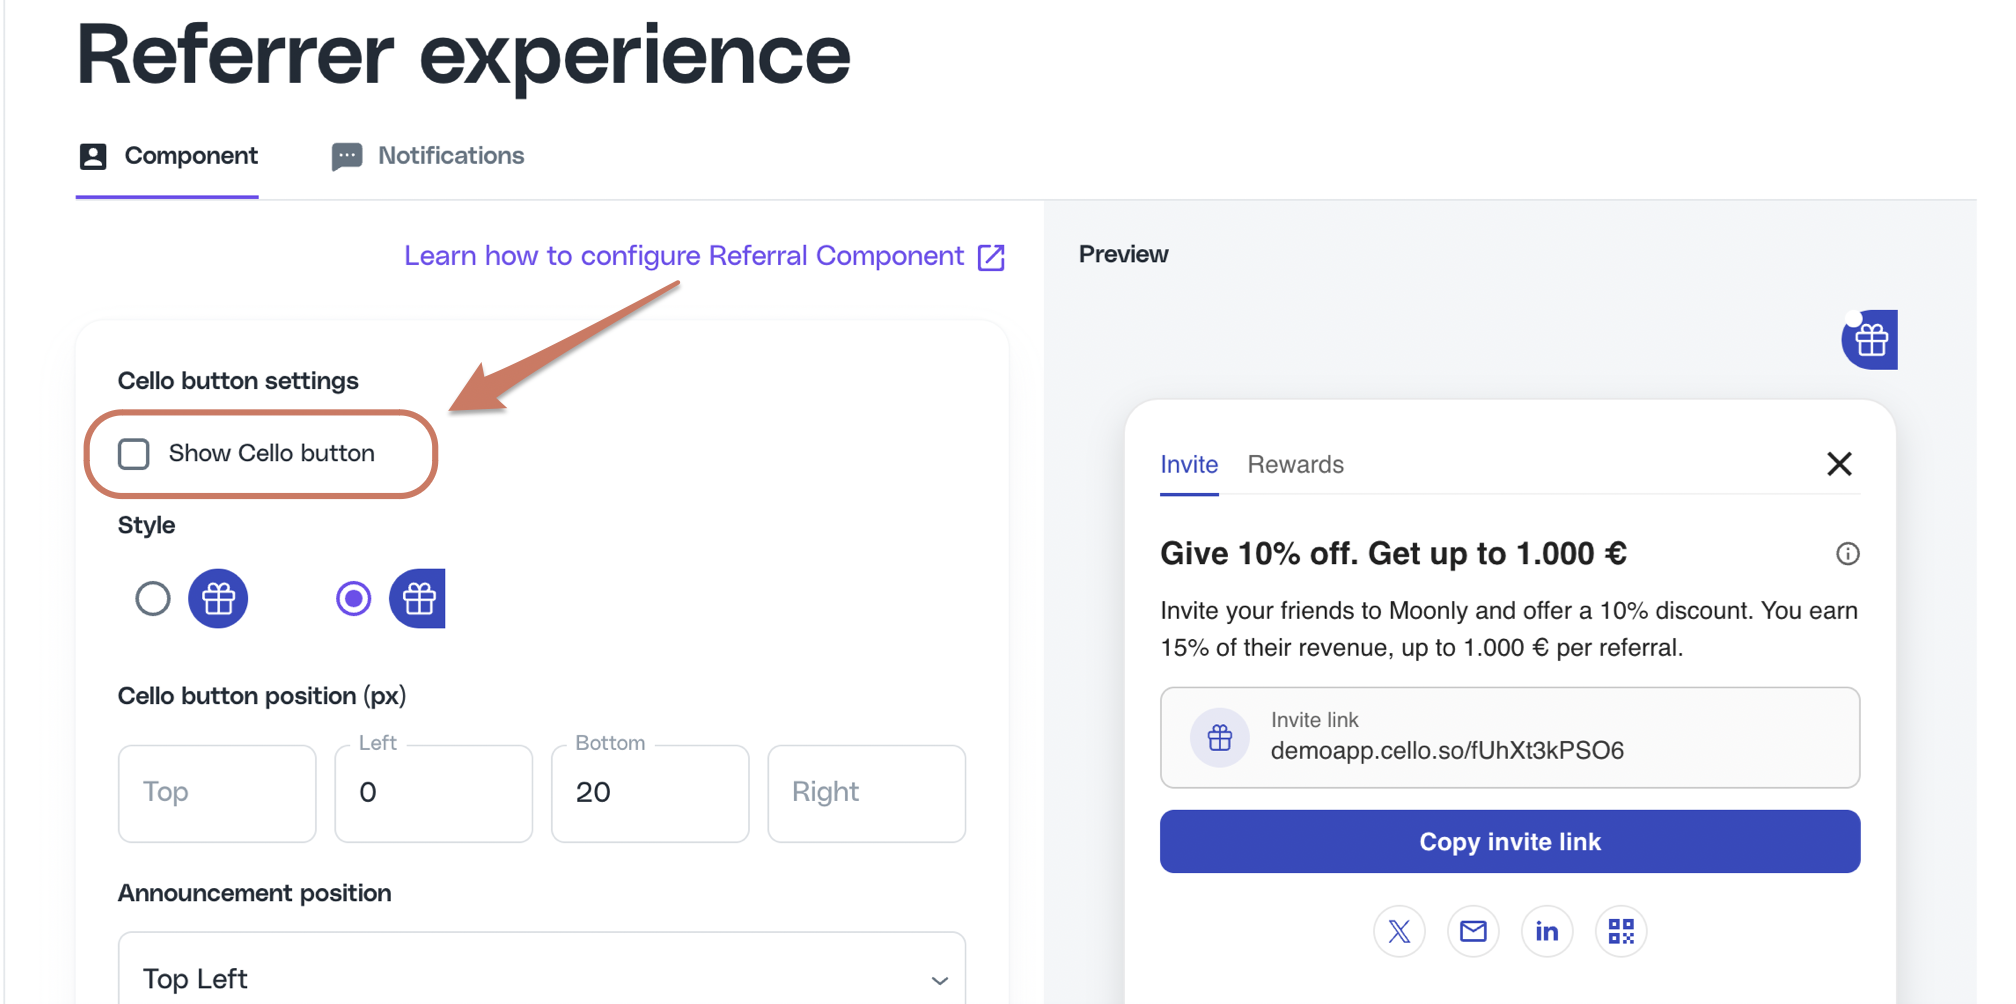
Disable Cello button
Cello button is a floating action button or bookmark style button provided as a default Referral Component launcher. When integrating a Customer Launcher, you may choose to disable the Cello button or keep it as an additional launcher.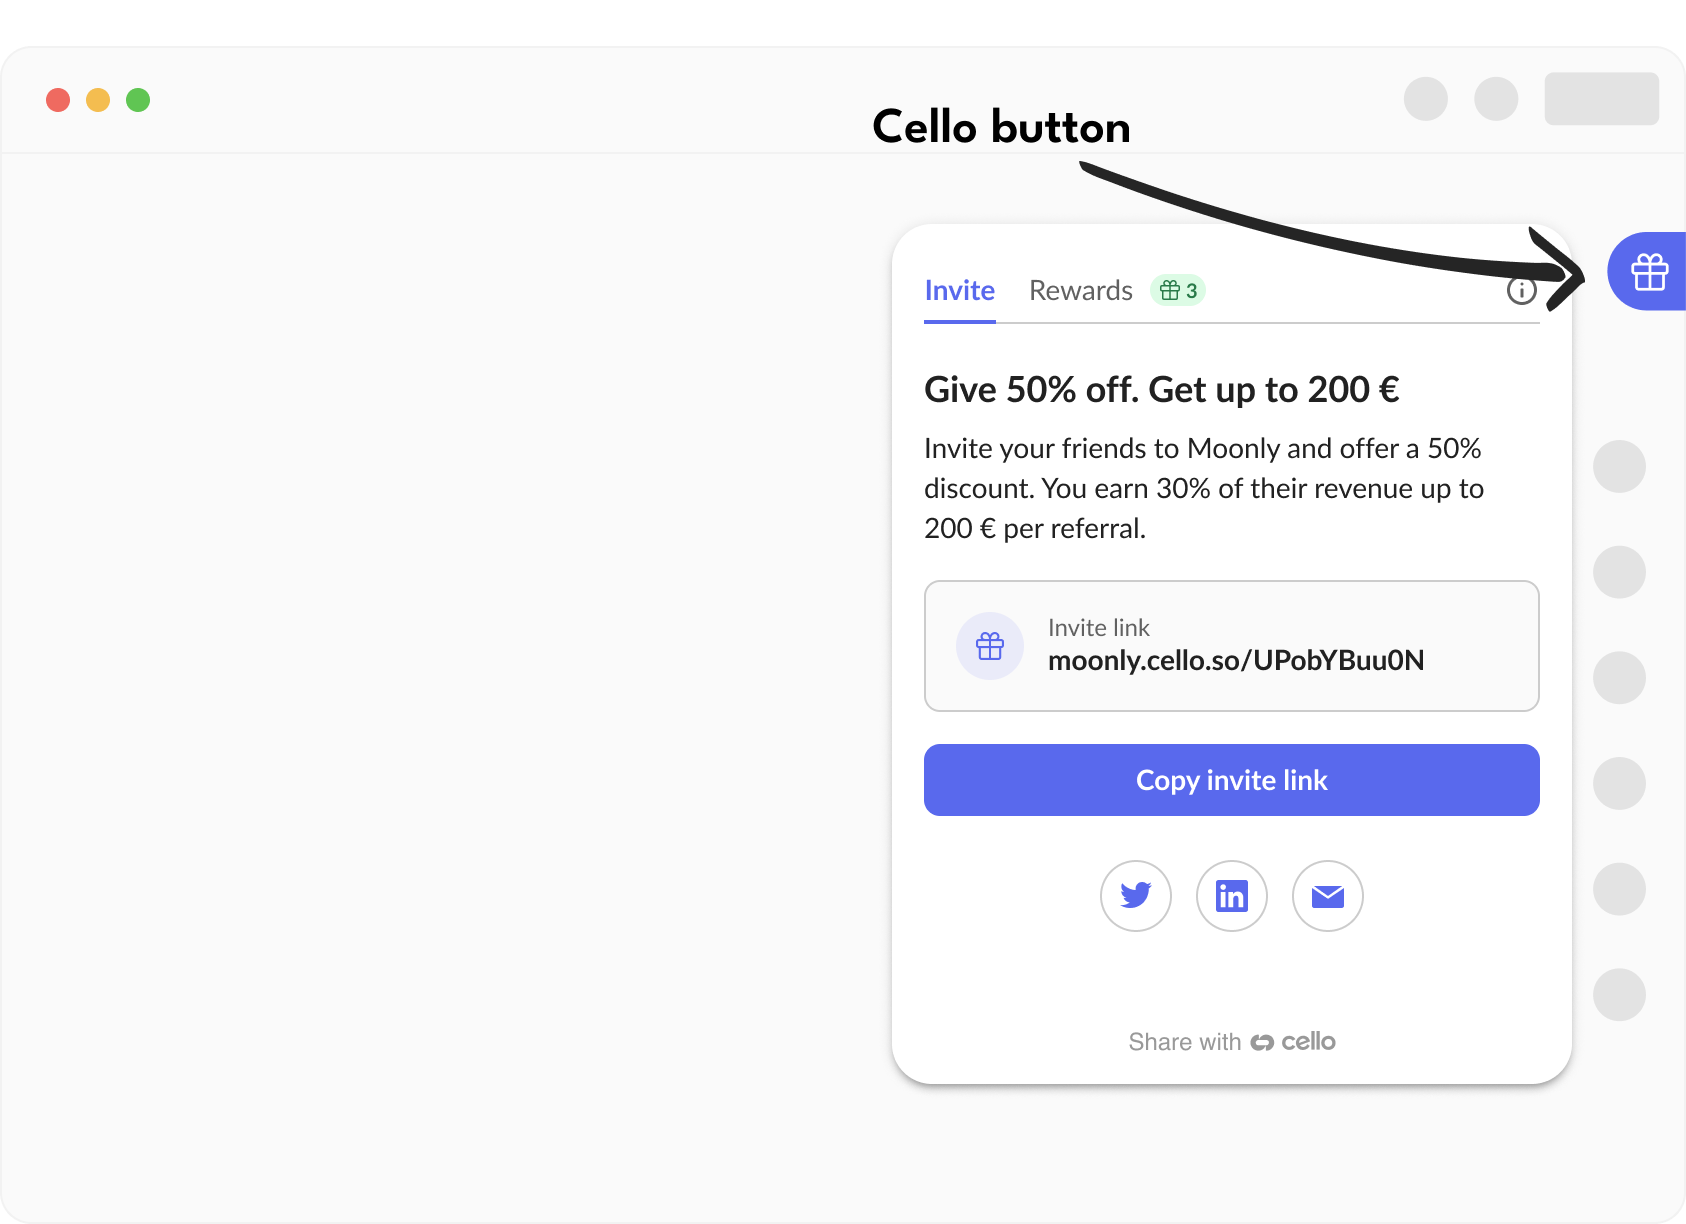
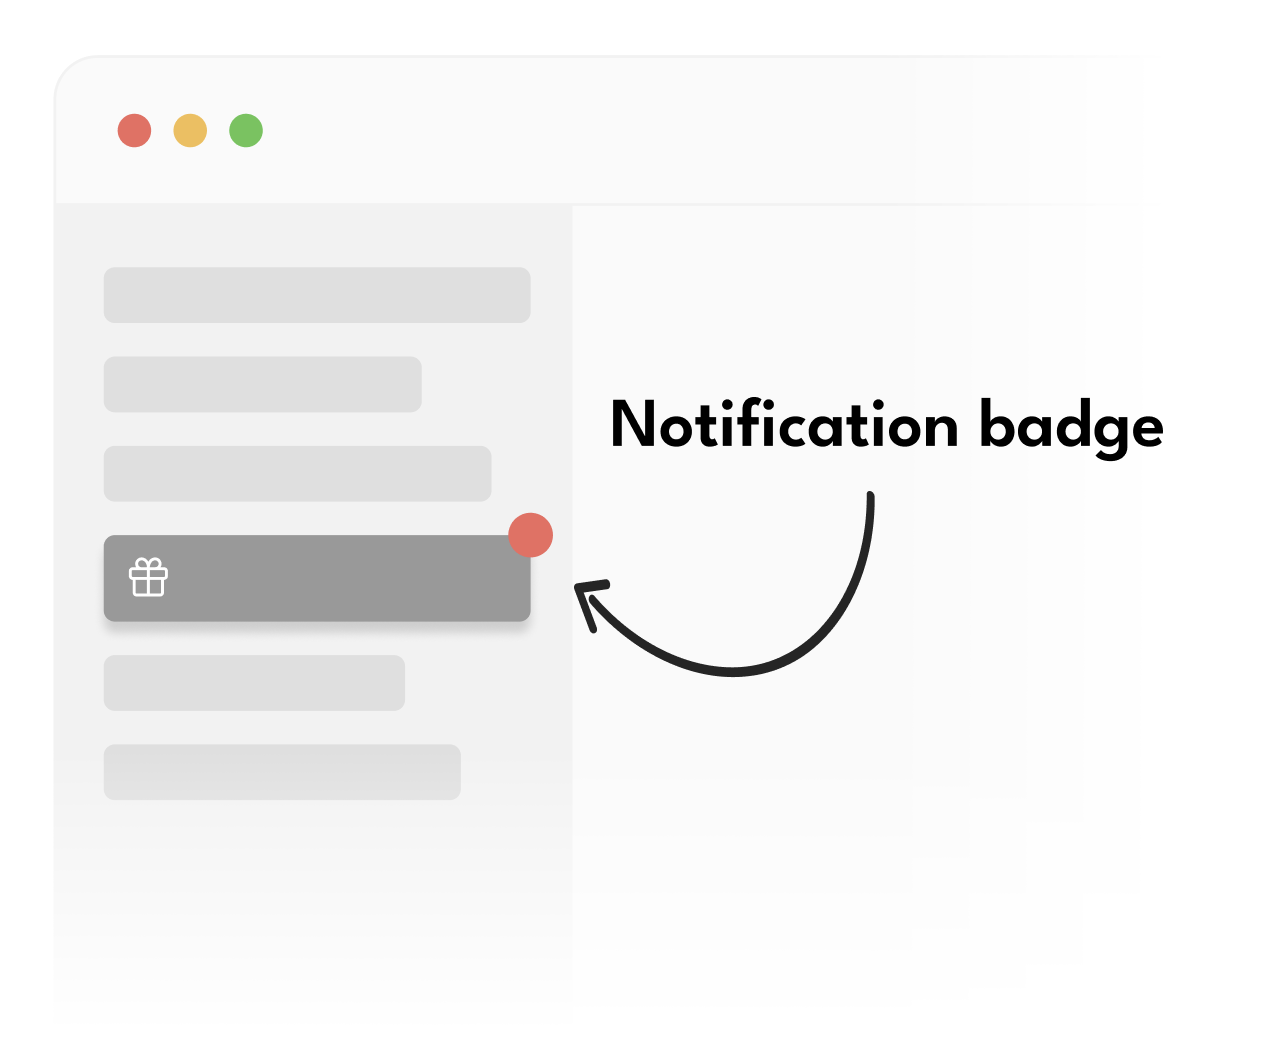
Configure notification badge
Default behavior (clickable with badge)
Default behavior (clickable with badge)
This is the default behavior - the element opens the Referral Component on click and shows notification badges.
Clickable without badge
Clickable without badge
Add
data-cello-badge="false" to hide the notification badge while keeping the element clickable.
Use this when you have multiple launchers but only want badges on some of them.Badge only, non-clickable
Badge only, non-clickable
Add
data-cello-click="false" to show the notification badge but prevent clicks from opening the panel.
Use this to show badge notifications on parent menu items for better visibility.Your own badge, with or without a count
Your own badge, with or without a count
Draw the badge in your own component instead, as a dot or with the number of unread rewards. Cello’s own badge is always a dot.
If Cello still opens the Referral Component from this element, add
data-cello-badge="false" to hide Cello’s badge.
See Show your own badge.The
data-cello-badge and data-cello-click attributes are optional modifiers. If you want the default behavior (clickable with badge), you don’t need these attributes at all.Testing notification badge positionTo trigger a notification badge to be shown on your Custom Launcher simply visit the referral link, of the same user you are testing with, e.g.
moonly.cello.so/pNRB1aYqArN . A link visit will trigger a view notification and a badge will be displayed.Add announcement selector
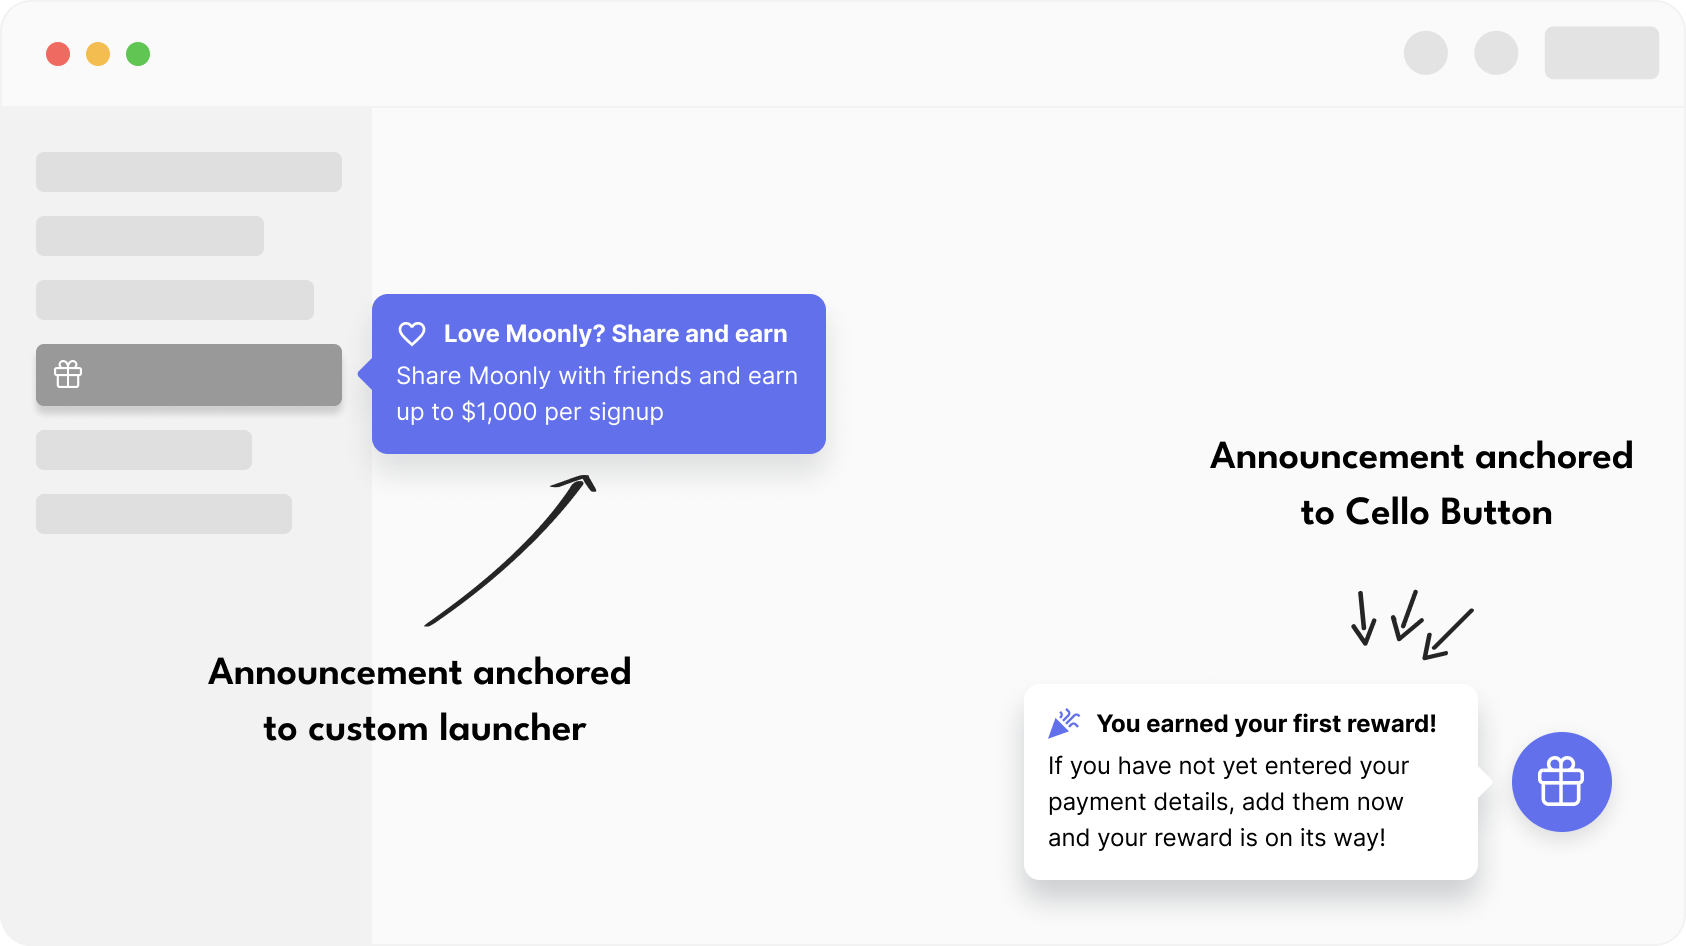
If the Cello button is disabled, the announcement needs to be anchored to one of your Custom Launchers.
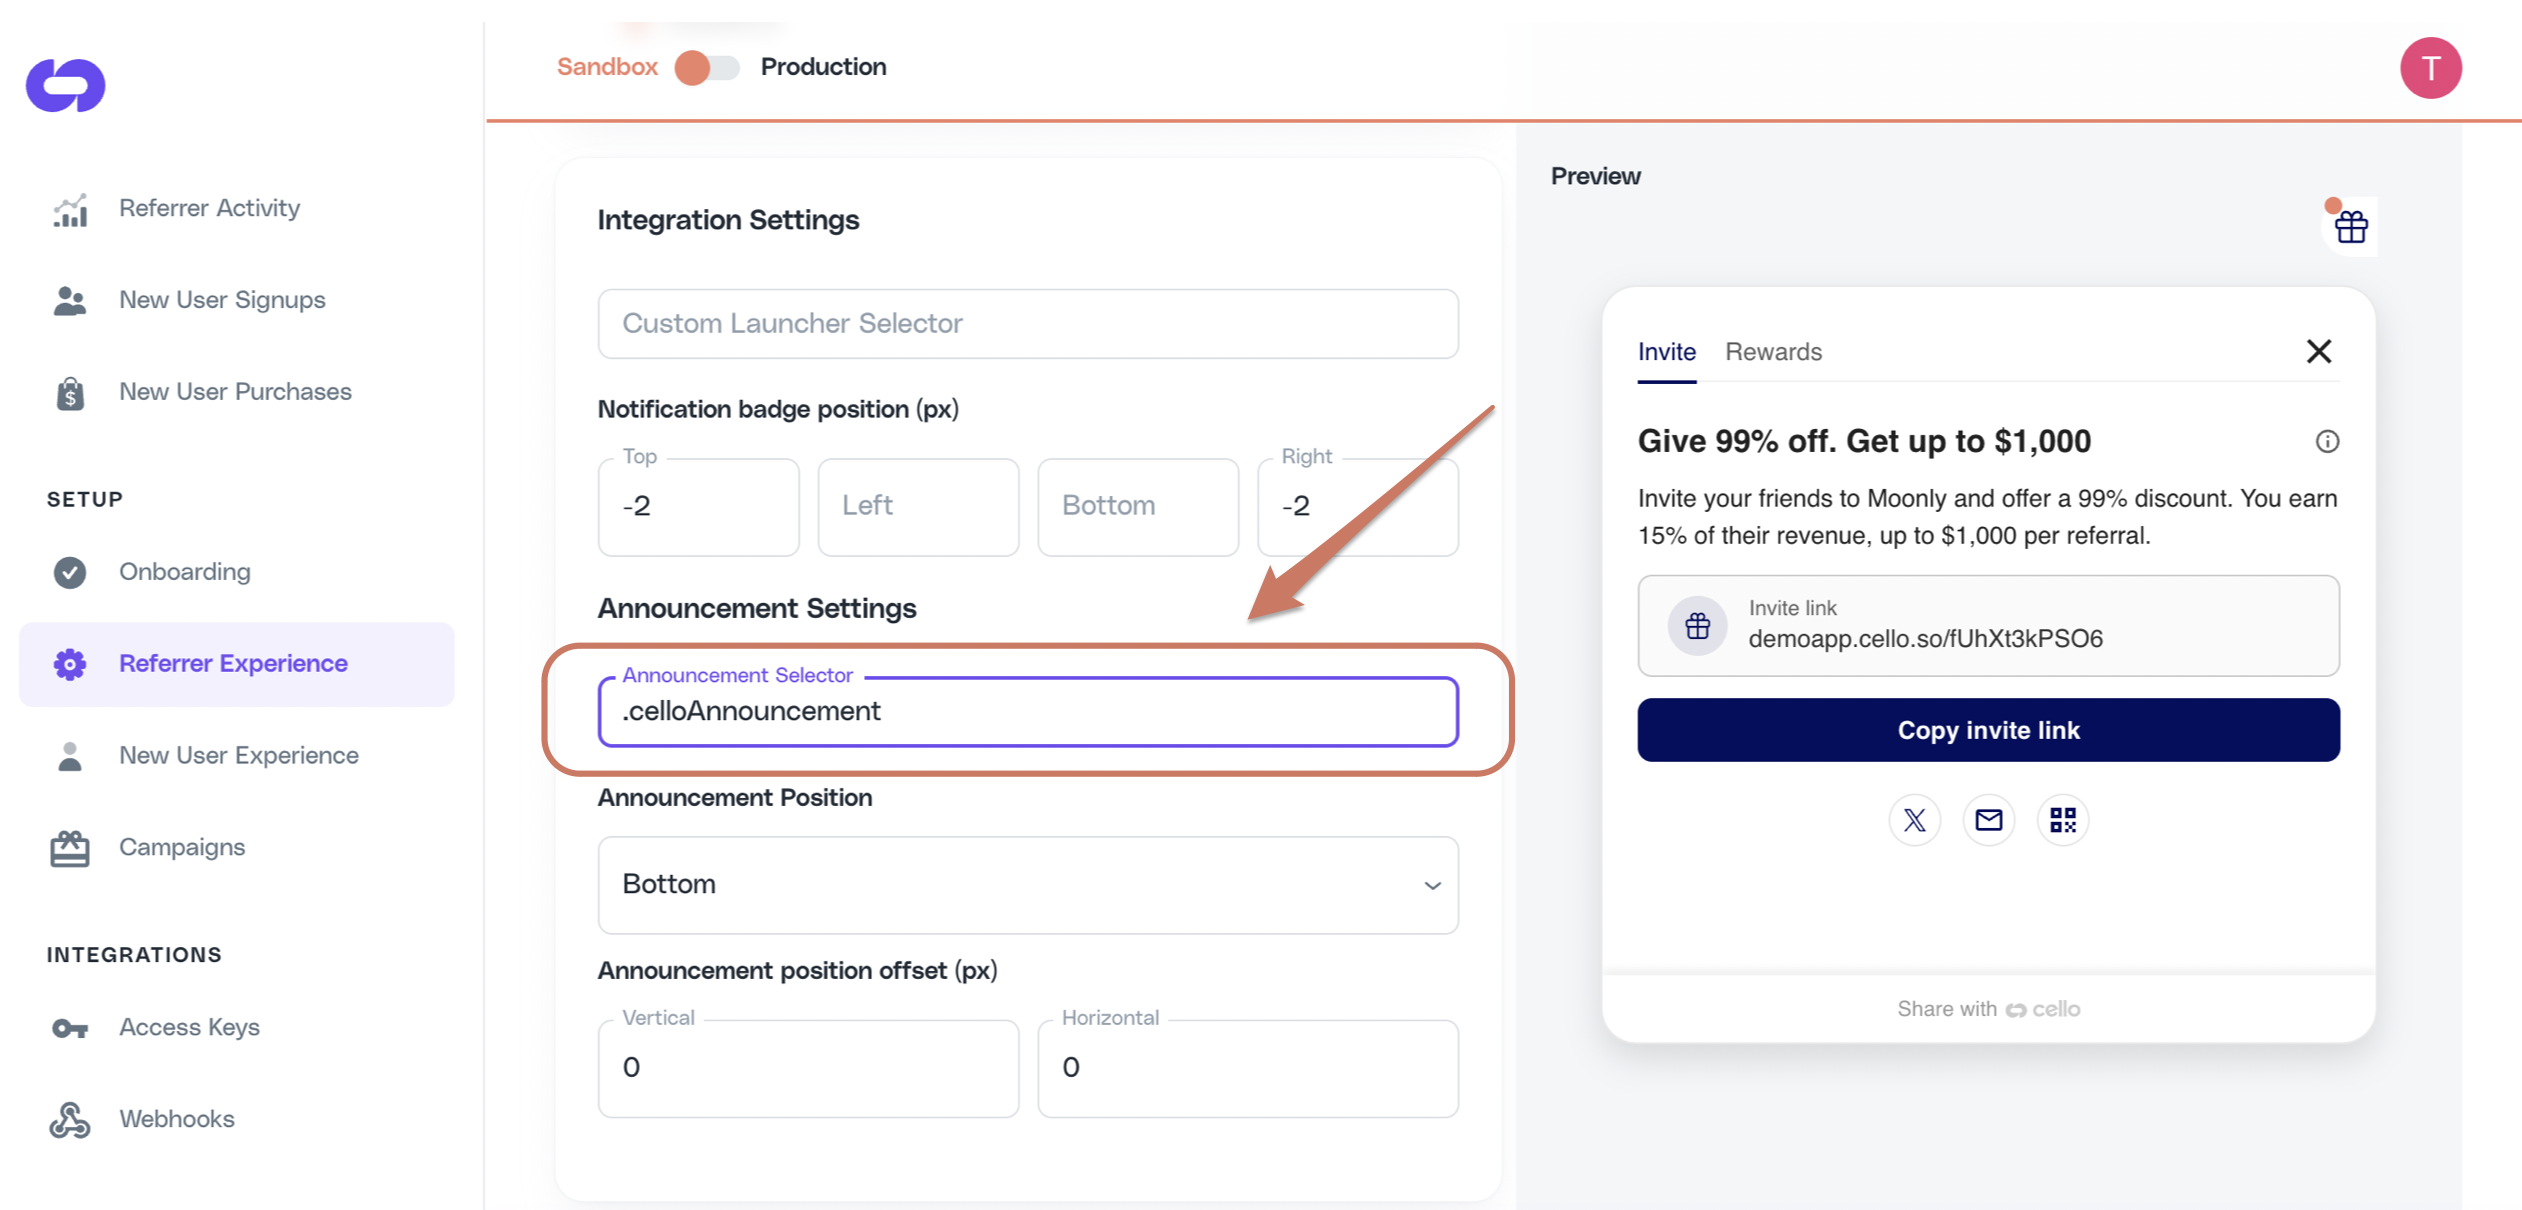
Testing Announcement positionWhile choosing Announcement Selector and choosing its position, you will want to see how it looks and make necessary adjustments. You can trigger an announcement using Cello JS A fulfilled promise from
showAnnouncement(announcement) method.Example below will trigger the default welcome announcement:showAnnouncement only means the SDK accepted the request. It does not mean the announcement is visible. If you see Promise {<fulfilled>: undefined} in the console but no announcement on the page, see Troubleshooting: announcement not showing.Build your own badge and announcement
By default, Cello draws the notification badge and announcements on your launcher, using the selectors you set in Cello Portal. You can draw them in your own components instead. cello.js tells you when the unread counts or the active announcement change, and you decide how they look. This is useful when:- Your launcher can’t be in the DOM before Cello initializes, for example in a single-page app.
- You want the badge and announcement to match your own design system.
- You want to show the number of unread rewards. Cello’s own badge is always a dot.
Open the Referral Component from your own launcher
Callopen() from your launcher’s click handler. Without a destination, the Referral Component opens on the invite tab. Pass "rewards" to open it on the rewards tab instead, for example when your badge shows unread rewards.
position: relative or a Custom Launcher Selector. If you don’t want the Cello button as an extra launcher, turn it off. To show the reward in your launcher text, use getLabels().
Show your own badge
AddonUnreadCountChanged to the options of your cello.boot() call from Step 3. It receives two values you can draw your badge from:
badgeCount: the number of unread rewards, otherwise1for another unread notification such as an unseen alert, otherwise0. It’s at most 99. Cello’s own badge doesn’t show a number, so this is only available through cello.js.counts.shouldShowBadge:truewhenever Cello’s own badge would show. UnlikebadgeCount, it also covers new referral link views.
onUnreadCountChanged right at boot with every count at 0, again once notifications have loaded, and then every time a count changes. It can also be called again with the same values. Both examples handle this, because they only set the badge from the values they get. Start with the badge hidden, so the first call with 0 doesn’t change anything.
When the user opens the Referral Component, Cello clears the counts and calls onUnreadCountChanged again, so your badge hides without extra code.
If your badge mounts after boot, read the current counts with getUnreadEventCounts(). It returns the same values as counts, including badgeCount, so you can draw the dot or the number right away.
If Cello still opens the Referral Component from this element through the Custom Launcher Selector, add data-cello-badge="false" to the element, so Cello doesn’t draw its own badge as well. See Configure notification badge.
Show your own announcement
In User experience → Widget in Cello Portal, leave the Announcement Selector empty and turn off the Cello button, so Cello has nowhere to draw its own announcement. Then addonAnnouncementChanged to the options of your cello.boot() call. Cello calls it with the active announcement, or with null when there’s nothing to show:
- The call-to-action opens the Referral Component on the page in
ctaDestination. That marks the announcement as read, and Cello callsonAnnouncementChangedwithnull. - The close button calls
dismissAnnouncement(), which marks the announcement as read without opening the Referral Component. Cello then callsonAnnouncementChangedwithnull. iconis an optional icon name,Heart,SuccessorGift, that you can map to your own icons.
onAnnouncementChanged with null right at boot, then with the announcement once it has loaded, if there is one. It’s called again when a new announcement arrives and when its text changes, for example after changeLanguage.
If your announcement component mounts after boot, read the active announcement with getActiveAnnouncement():
text can contain <strong> tags. The example above shows it as plain text. To keep the bold parts, sanitize text first, then insert it as HTML.Full example
Both versions connect the launcher, a numbered badge and the announcement to onecello.boot() call. The React version keeps the latest values from Cello in a small store, so components that mount after boot show the current badge and announcement straight away.
- HTML
- React
Test your components
Testing your badge and announcement
- Badge: visit the referral link of the user you’re testing with, e.g.
moonly.cello.so/pNRB1aYqArN. The view setsshouldShowBadgetotrue, so a dot badge shows. Views don’t add tobadgeCount, so a numbered badge stays hidden until the user has an unread reward or alert. - Announcement: run
window.Cello("showAnnouncement", { "type": "welcome-announcement-1" })in your browser console. Cello callsonAnnouncementChangedwith the welcome announcement. - Clearing: open the Referral Component from your launcher. Cello clears the counts and the announcement, so both disappear.
Troubleshooting: announcement not showing
Short answer: The most common cause is that your Announcement Selector matches more than one element, and the first match in DOM order is invisible (zero-sized, hidden, or off-screen). Cello usesdocument.querySelector, which always picks the first match. Narrow the selector until document.querySelectorAll(<your selector>) returns exactly one visible element.
If you’d rather not depend on a selector at all, show announcements in your own component instead. Cello doesn’t position those, so none of this section applies.
How announcement positioning works
- Cello calls
document.querySelector(<your Announcement Selector>)once when an announcement is rendered. document.querySelectorreturns the first matching element in DOM order, not the most visible one.- The matched element must be present in the DOM, have non-zero width and height, and not be
display: noneorvisibility: hiddenat the moment the announcement renders. - A fulfilled
showAnnouncementpromise means the SDK accepted the request. It does not mean the announcement is visible to the user. - Cello does not retry, fall back to siblings, or rescan the DOM if the matched element is invisible.
Symptom: showAnnouncement returns a fulfilled promise but nothing appears
If your browser console shows:
Symptom map
Related questions this section answers
- Why does
showAnnouncementresolve but no announcement appears? - Why is my Cello announcement invisible?
- Why does my Cello announcement render at the top-left of the screen?
- How do I fix “announcement selector matches multiple elements”?
- Why does Cello pick the wrong element for my announcement?
- Cello announcement not working / not showing / not appearing