

Overview
A notification event is securely sent to Cello through the webhook endpoint every time a customer makes a purchase or a customer record is created or updated. Cello checks these events to perform the following actions:- Determine if a reward for the referrer needs to be created and paid out
- Inform the referrer about new signups and rewards
- Cancel recurring rewards if a subscription is cancelled
Endpoint URLs
You will find the webhook endpoint URL for both Sandbox and Production environments in Developers → Webhooks.Securing the webhook
To secure the webhook in Step 5, you will find credentials for both Sandbox and Production environments in Developers → Webhooks.Connecting Chargebee
Prerequisites
Before configuring webhooks, ensure your Chargebee customers include the required Cello attribution fields. These information enables proper attribution and reward tracking.When to add additional fields:
- If you create Chargebee customers at signup → You would have already added metadata or custom fields to the customer during the Setup Step “Track Signups”
- If you create Chargebee customers at purchase → Make sure to add metadata or custom fields when creating the customer
Required Chargebee Customer attribution fields
You can also choose to use Chargebee custom fields (CF_) to add referral data to the event. Learn more about custom fields in the Chargebee documentation
meta_data attribute or as a cf_ custom field.
Steps
You will add a webhook to your Chargebee configuration to connect Chargebee and Cello. This can be done in both test and production environments separately.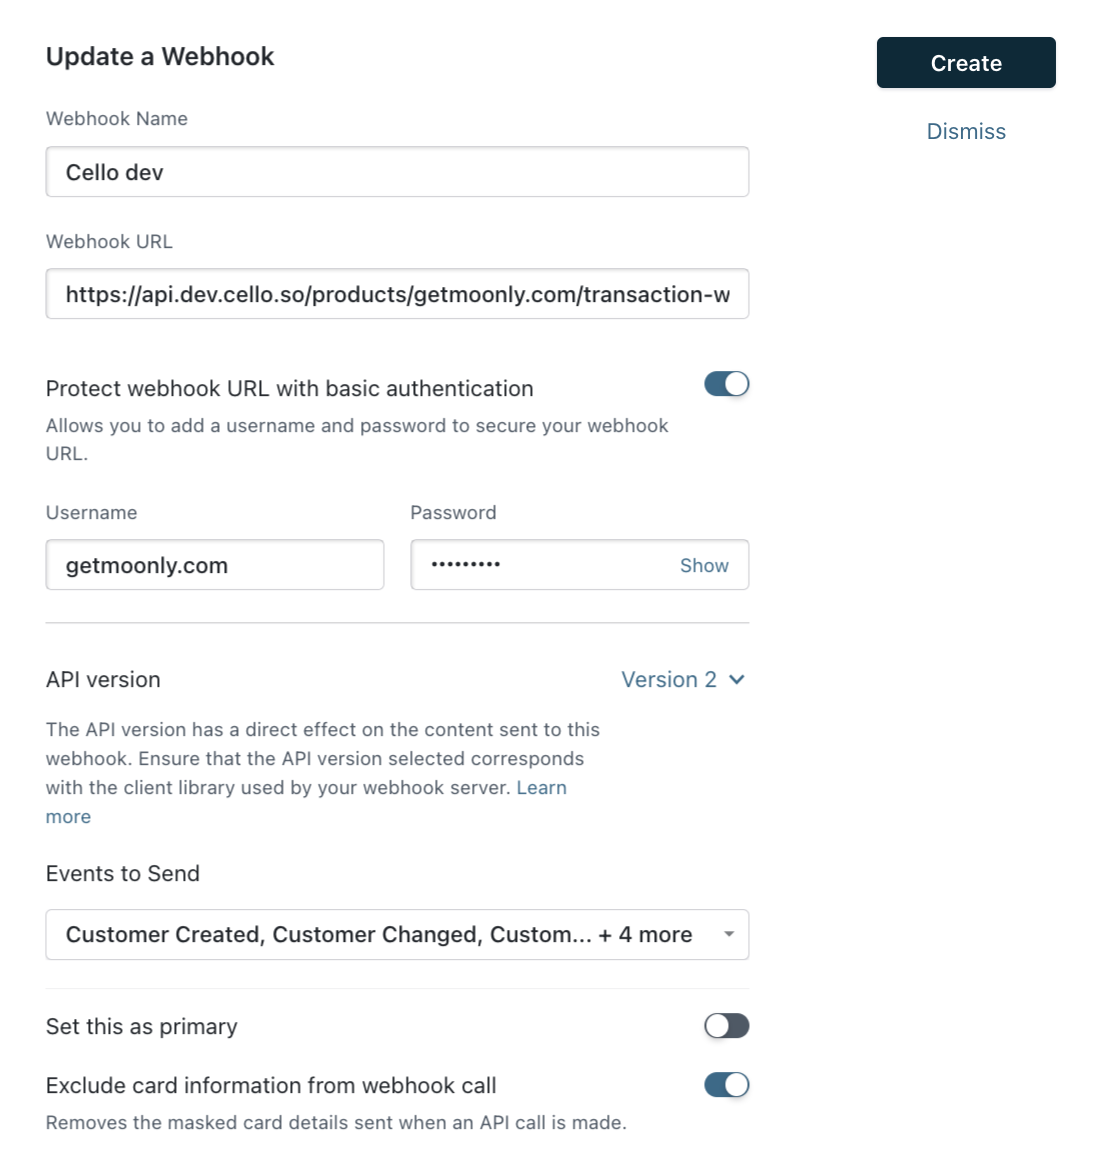
1
Log into your Chargebee Dashboard
2
Add a new Webhook
From the sidebar, select Settings > Configure Chargebee and click on “Webhooks”. Next Click on ”+ Add Webhook”.
3
Enter the Endpoint URL
Choose the Endpoint URL corresponding to the environment you are setting up: Sandbox or Production.
4
Select the events to send
Select the events you want to send under “Events to Send”:
Customer Created,Customer Changed,Customer DeletedPayment Succeeded,Payment Refunded,Payment Failed
5
Secure the webhook
Select “Protect webhook URL with basic authentication” and add the
product_id and secret provided in the Cello Portal.6
Click "Create" to enable the webhook
Webhook created!